


Wooden Mate Gourds (Carob, Palo Santo): The Guide to Proper Curing
 Alexis · Founder of YVY Maté
Updated on
4 min read
Alexis · Founder of YVY Maté
Updated on
4 min read

Key takeaways
- Wood doesn't require the squash's full curing, just a short preparation
- Grease, add yerba, scrape, rinse with hot water, then let dry fully in the open air
- Always dry the gourd upright after each use: wood fears stagnant moisture
You've just treated yourself to a new wooden mate gourd - always a special moment. Whether you fell for the sturdiness of carob wood (algarrobo) or a squash gourd, it isn't quite ready to use yet.
Unlike ceramic or stainless steel, wood is a living, porous material that reacts to heat and moisture. That's where an absolutely crucial step comes in: curing your wooden mate gourd.
Skip this step, and you risk not only spoiling the taste of your first brew, but above all watching your magnificent gourd (or "mate" in Spanish) crack or develop mold.
Don't panic - we'll guide you step by step to prepare your gourd by the book, extend its lifespan and bring out the best in your yerba mate.
Why is curing a wooden mate gourd essential?
Curing, or seasoning ("curado" in Spanish), isn't just a purist's myth. It's a natural process that protects your gourd, improves the flavor of your future mates and, above all, prepares it for its new life!
Preventing cracks and leaks
Dry wood, suddenly exposed to boiling water, suffers thermal shock. The fibers expand violently, causing irreparable cracks.
Curing accustoms the wood to heat and moisture gradually. What's more, the tannins in the mate leaves fill the micro-pores of the inner wall, making the vessel perfectly watertight - and, over time, faster to dry.
Preventing mold growth

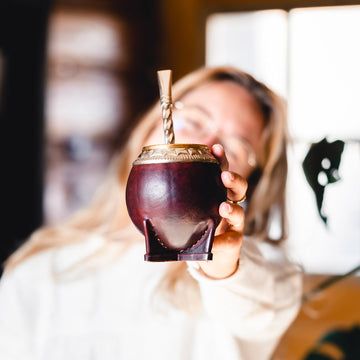
Carob wood mate gourd
An untreated gourd absorbs water like a sponge. If moisture lingers in the wood fibers, the door is open to fungi and mold. By saturating the wood's pores during curing, we stop future brews' water from penetrating too deep.
Improving the aromatic profile
The woods used for gourds hold tannins and strong natural resins (Palo Santo especially). Left untamed, the wood can bring an unpleasant, even astringent bitterness to your first mates.
Curing softens these woody notes so they enhance the yerba mate rather than dominate it.
Step by step: curing a wooden mate gourd
Now to the heart of the matter: how do you cure your wooden gourd?
Unlike curing a traditional squash gourd, which mostly involves scraping and smoothing, the wooden mate gourd calls for a treatment focused on nourishing the fiber.
Here's the foolproof method.
Step 1: Feed the wood (the greasing)
This is the too-often-forgotten secret of wooden gourds. Before any water goes in, the material must be fed to give it elasticity.
- Take a knob of unsalted butter (or coconut oil, or a neutral oil).
- Coat the entire inside of your gourd generously, using a paper towel or your fingers.
- Let the wood absorb the fat for 24 hours. If it's Palo Santo, feel free to apply some to the outside too.
Step 2: Filling with used yerba
Once the wood is fed, on to the curing proper.
- Fill the gourd three-quarters (3/4) full with yerba mate. Ideally use "spent" yerba (already brewed in a previous mate). If you don't have any, fresh yerba will do.
- Press lightly so the yerba sits in good contact with the walls.
Step 3: Moistening with hot water
Pour hot water (never boiling - aim for around 70°C to 80°C) over the yerba up to the level of the virola (band). The yerba will swell and absorb the water. Top up a little if the level drops too fast.
Step 4: The resting time (patience!)
Let everything rest for 24 to 48 hours at room temperature. During this time the wood expands gently, absorbs the yerba's tannins and seals its pores. If the surface dries out, add a trickle of hot water.
Step 5: Cleaning and final drying
Empty out all the yerba mate. Rinse your gourd with lukewarm water (never use soap or dish liquid - the wood would keep the taste!). Dry the inside with a clean cloth or paper towel. Finally, let your gourd air-dry, opening upward or tilted on its side (never upside down - moisture would stay trapped inside).
Your gourd is now ready for its first mate, prepared by the book!
Pro tip: as with squash gourds, after curing we advise stringing together as many mates as you can - it adds a maximum of tannins to maximize the curing!

Curing a wooden gourd
Daily care: how to make your gourd last
Nailing the curing of your wooden mate gourd is a great start, but daily care matters just as much. Nothing complicated - here's what not to do:
- Don't let the mate sit: empty and rinse your gourd right after finishing your mate session.
- Let the gourd breathe: make sure the inside is fully dry before storing it. Moisture is enemy number one - dry it opening upward.
- Beware thermal shocks: never pour 100°C water into cold wood.
- Regular upkeep: if your gourd sits unused for several weeks or months, reapply a light film of fat (butter or oil) inside, so the wood doesn't dry out and crack over time.
Caring for your gourd is an integral part of the mate ritual. It's an object that develops a patina over time, its color deepening, keeping the memory of all your tastings!
The different types of wooden gourds
Not all gourds are equal - the wood species determines how it will react.
- Carob (Algarrobo): one of Argentina's most popular woods. Very hard and durable, it lends a slightly sweet taste to the brew. It needs a good initial greasing, as it tends to dry out considerably if not used regularly.
- Palo Santo: this "sacred wood" is famed for its highly fragrant sap (pine and citrus notes). It is, however, very fragile and prone to cracking under abrupt temperature changes. Curing a Palo Santo gourd takes patience and a very generous oiling.
- Lemon or orange wood: rarer, these woods bring a light, much-appreciated touch of acidity, but their density also calls for meticulous preparation.
Frequently asked questions
How do you prepare a new wooden mate gourd?
Can the wood of a mate gourd go mouldy?
How long does a wooden mate gourd last?
Want to taste an exceptional organic mate?
Discover our yerbas, sourced directly from our partner growers committed to agroforestry, and certified organic.
Discover the shopRead next

Starting Mate: Which Mate to Choose for Your First Time?

